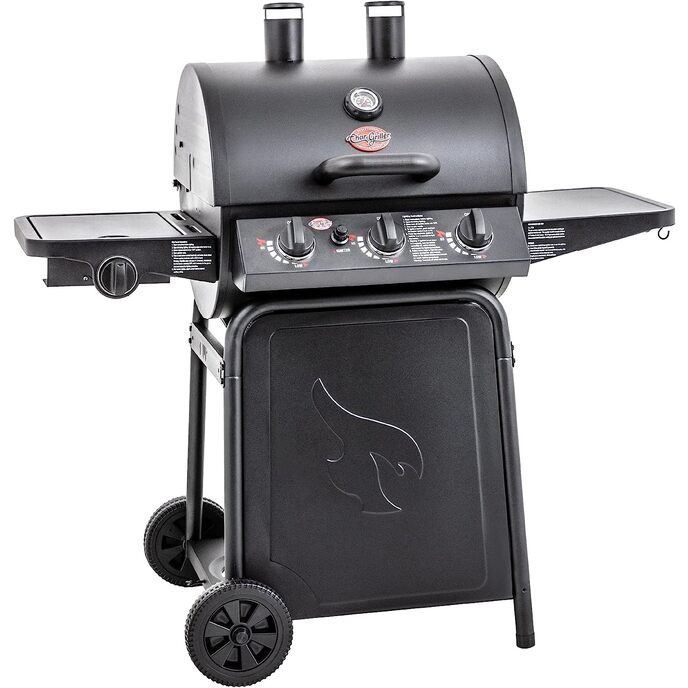
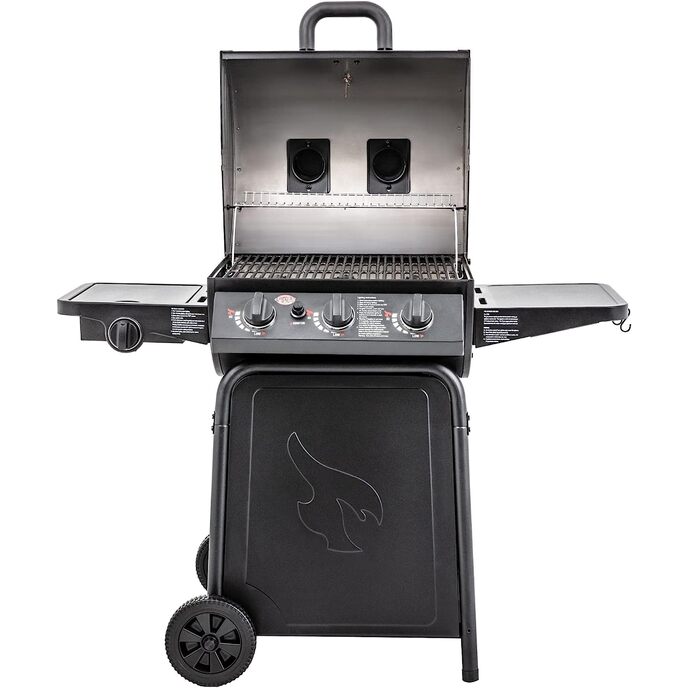
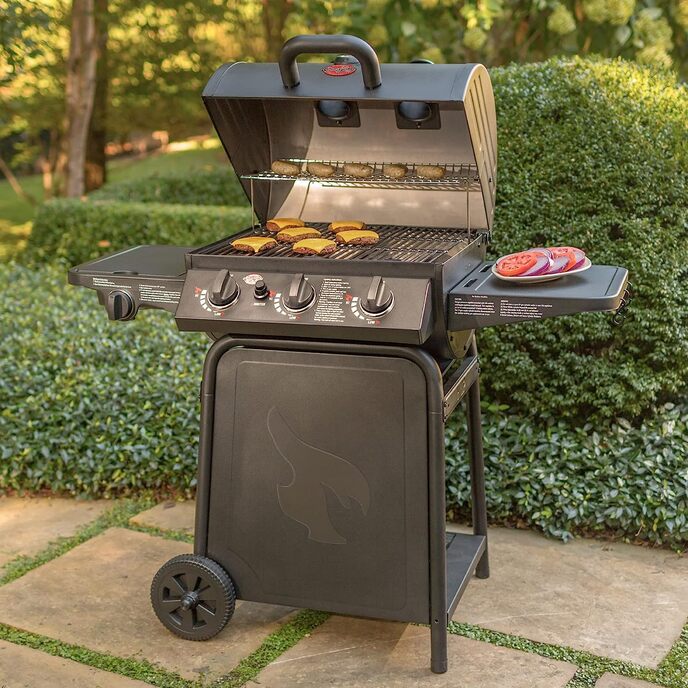
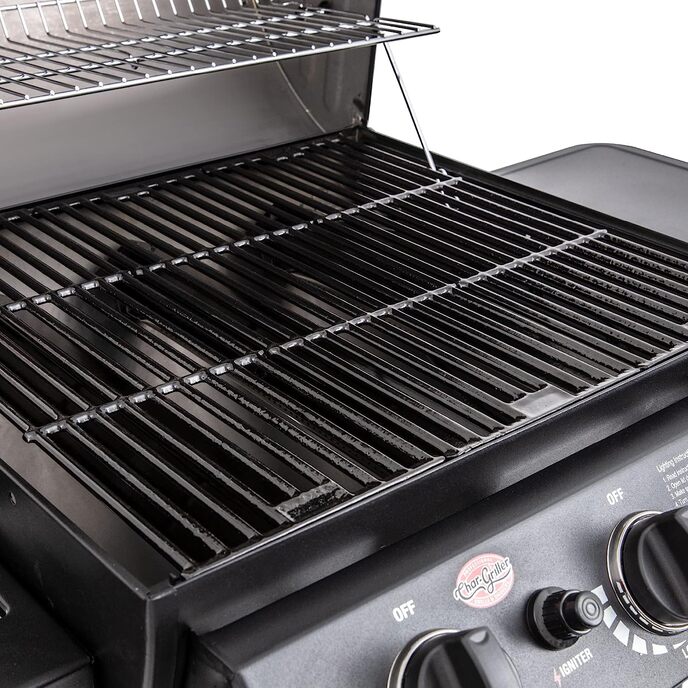
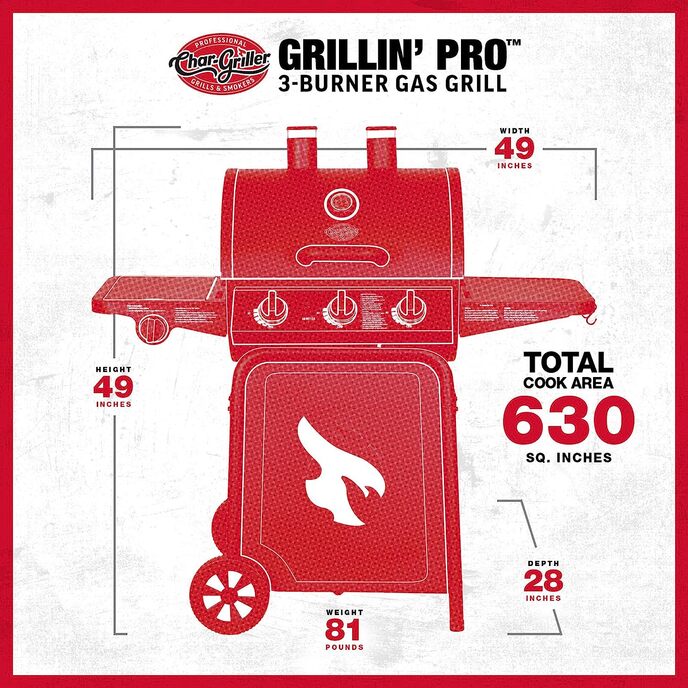
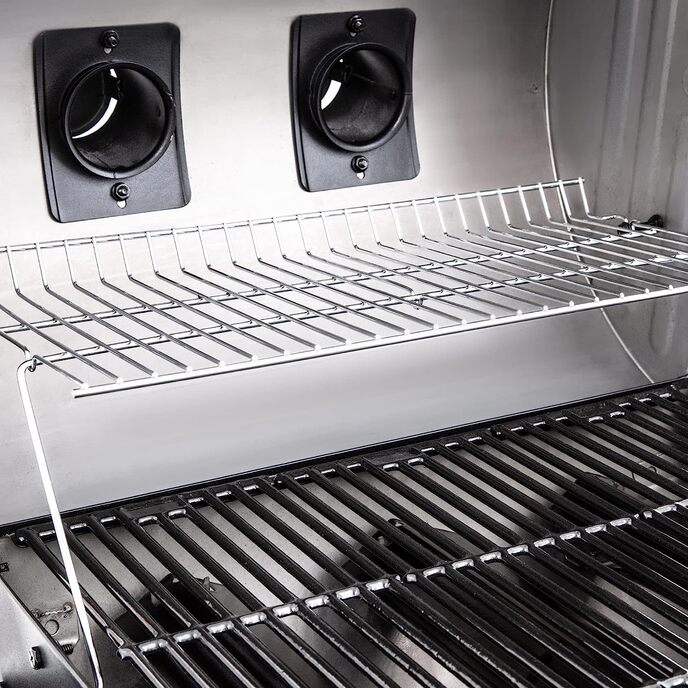
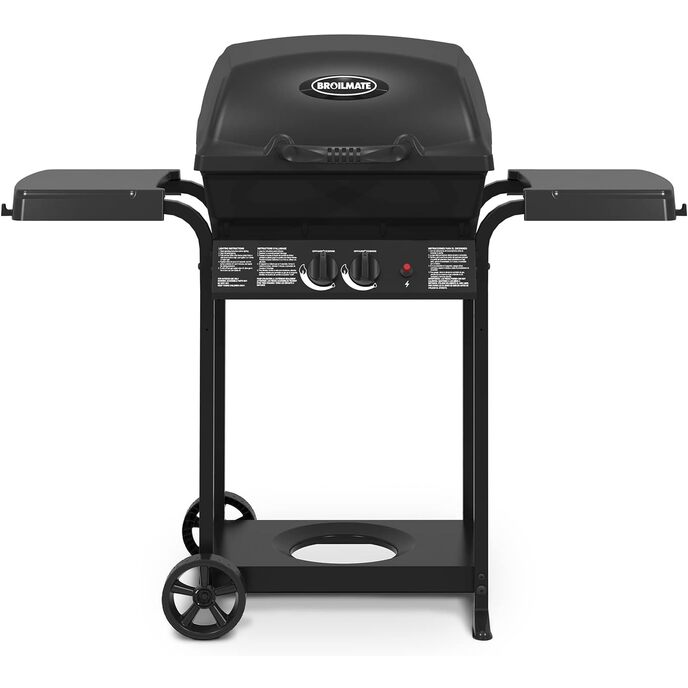
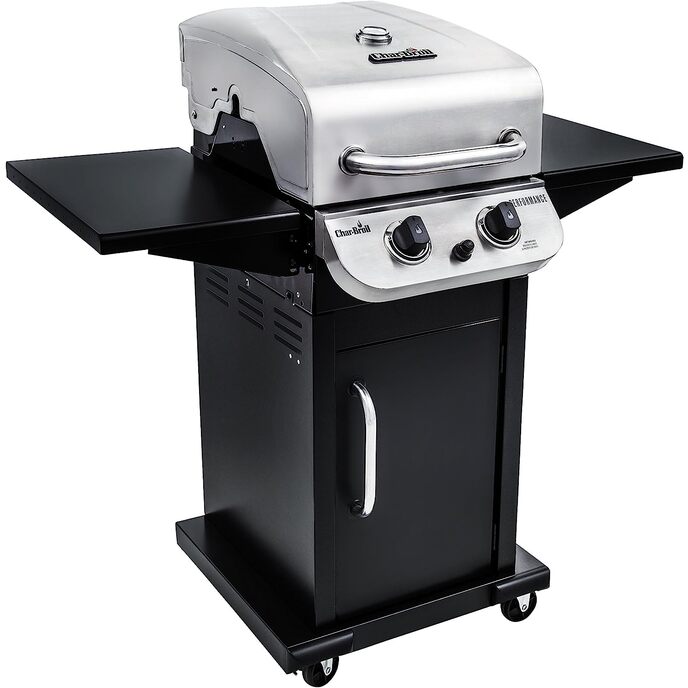
3 Stars overall since I haven't used the grill yet. 1 star for assembly. This review is about how bad the instructions are. The review is followed by changes to the instructions. The instructions read like they were written by an engineer based on how to theoretically assemble the grill. Possibly in zero gravity. Input from a technician would have benefitted these instructions greatly. Assembly can be done with one person, as I did. Two people would be easier if you're a hive mind since anything less would have person A holding components in place while person B storms away after having tried to thread one bolt for the past 20 minutes, telling person A "Up just a little, no, no, too much. Okay now a little right, back a little. You went up when you did that, come back down. Now pivot it clockwise slightly, no, clockwise." In all seriousness, the following changes to the instructions will make assembly easier. This is in complement to the instructions provided. The last step says to tighten all nuts and bolts, which is completely impractical since you would literally have to undo Step 18 to do Step 21. The following will specify when and what to tighten. Separate out all of the components and inspect them. Very possible you'll want to degrease the grill body and hood. Assemble when ready. As you install components, remove any and all packing material. No styrofoam should be left on the grill. Start with Step 2. Put the bottom shelf face down on a table or the now empty large cardboard box the grill came in. Lay the short legs next to the bottom shelf with the bottom of the legs at the tank hole side and the "faces inside" label facing up. Attach the short legs to the bottom shelf on the tank hole side. Swing away the short legs and repeat for the long legs on the opposite side. I assure you this is easier than doing Step 1, then Step 2. Now do Step 1. Flip the bottom shelf to face upright. Put a crossbar on a short leg, and the other side on the long leg, no bolts yet. Repeat for the other legs. Attach the leg braces. You should now have a rather sturdy frame with untightened bolts. Step 3. Tighten all of the bolts in the bottom shelf. For wheel assembly, use the small cotter pins. Large cotter pins don't sit in the well of the wheel. Defeats the purpose of the hub cap. Small cotter pins fit, and are concealed by hub caps. Use the large ones on Step 16 since that's all you have. Step 4. Do, then tighten bolts. Step 6. Do, then tighten bolt. Step 7. Do, then tighten bolts. Step 5. Orient the Stopper Bracket so it curves toward the flat edge of the grill body it's closest to. The lip should be facing out. Do the rest of the step. Step 8. Do, then tighten bolts from Step 5. Slide the square Grease Tray into the brackets under the catch pan from the backside of the grill (this isn't covered anywhere in the instructions). Step 9. Wait 'til the end to install the knobs. Perfect opportunity for the 2nd person to help by holding the Side Burner Body while you install the control panel assembly. If alone, then detach hose with 7/16" spanner or crescent wrench, or whatever makes installing the control panel easier. Tighten bolts. Install Side Burner and tighten bolts. Step 10. The Hose Guide Bracket for is on the hose and tucked into the Control Panel Assembly. Do the step, then tighten all of the leg brace bolts from Step 1. Step 11. Do, then tighten bolts. Step 12-13. Do. No additional comments. Step 14 (1/2). Install handle only. Tighten wing nuts finger tight. Step 16. Not sure why hinge pins are threaded and have cotter pins. Thread in hinge pin 3/4 of the way on each side. Alternate tightening and raising/lowering the hood so that the hood pops into place. Do not overtighten hinge pins. Use to align hood and body as best as possible. Then install large cotter pins. Step 14 (2/2). Install thermometer and bezel. Do not overtighten. Step 15. Do, then tighten nuts and bolts. Step 17. Tighten first 4 hex nuts before putting the rack on. Install rack, finger tight on the last 2 hex nuts. Raise and lower hood to make sure the rack and hood move properly. Check that everything installed to this point has been tightened appropriately. Step 18. Pot stand is already in place. Remove the twist tie. Do the step. Step 19. Don't thread the wing bolt all the way unless you're installing a propane tank. Just enough not to drag it or kick it. Step 20. Do. Do not overtighten. Step 21. Omit this step. After installing a propane tank, perform a leak test.